Showing posts with label texture. Show all posts

Thursday, March 24, 2016

Green Experiment

When I started my current acrylic paintings, first I had to determine which of my old acrylic paints were still good.

This led to some experimenting, when I realized that my tube of green paint had mostly dried up and would no longer squeeze out of the tube. I cut open the tube with scissors, then dropped the dried part into a bucket of water. I soaked some ripped up strips of paper in this green water for a few hours, and then crumpled them up and laid them to drip-dry on a small flat canvas board I had. I figured it would give the background some interesting texture for whatever not-yet-planned acrylic painting I would use the canvas board for in the future.

I mean, I couldn't do anything else with the dried up paint tube, so I thought I might as well try. The paint was destined for the trash can otherwise.

So here is the end result of the experiment:


Strips of watercolor paper soaked in green water

The canvas, complete with the texture of dried, crumpled up bits of soaked green paper strips

I don't know why my phone camera has started putting these shadow stripes across my pictures. I don't see it happen anywhere else but when I'm trying to take a photo of artwork in my basement studio. Maybe it's something about the fluorescent lighting down there? It doesn't seem to have problems in any other room of my house, or outside.

It's really annoying.

Anyway, the response on Instagram was pretty great! I got several comments:


It's not something I'll be using anytime soon (I'm a little busy with other projects at the moment), but eventually I'll come back to this canvas board and make a cool abstract painting out of this. :)

Friday, December 11, 2015

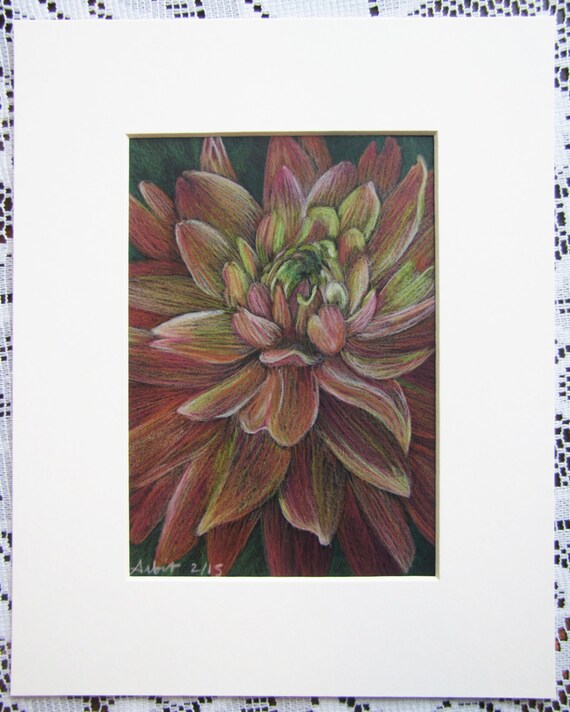
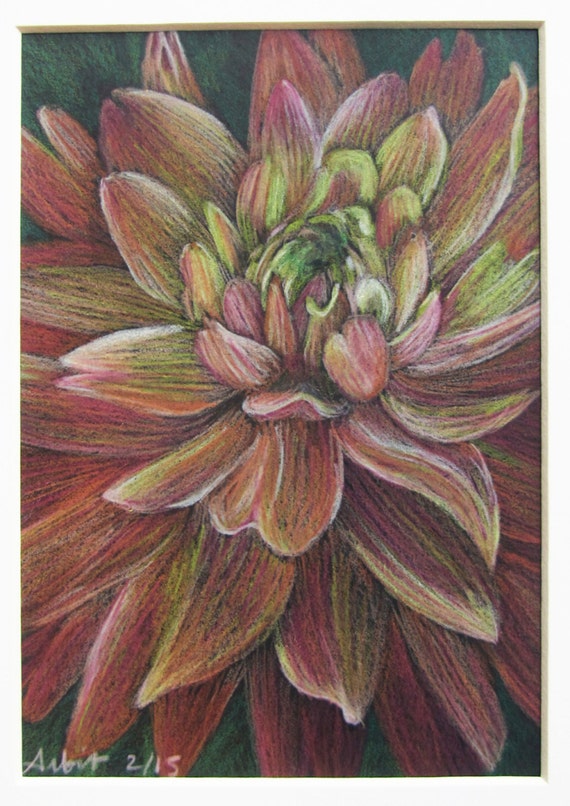
Radiant Dahlia

This 5"x7" colored pencil drawing on black paper is called "Radiant Dahlia" and is available for purchase on my Etsy page.

"Radiant Dahlia" by Andrea Arbit
5x7 colored pencil drawing on black paper

"Radiant Dahlia" by Andrea Arbit
5x7 colored pencil drawing on black paper
Comes with 8x10 white Crescent mat

Like all of my 5"x7" drawings, this "Radiant Dahlia" comes with a 8"x10" white Crescent mat suitable for framing.

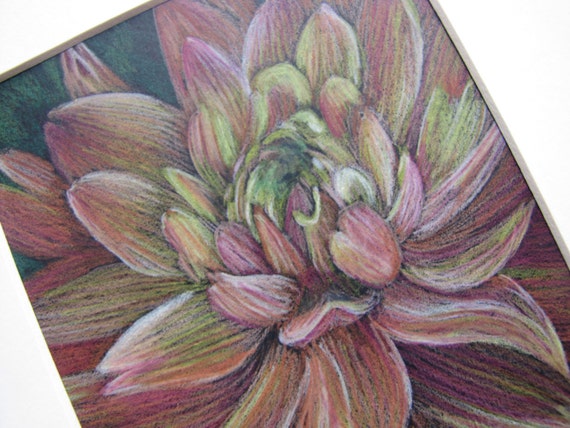
For this drawing especially, I paid attention to the direction of my lines, because I knew right away that I wanted to use line as a way to show the texture of the petals and to draw the eye in/out of the center of the flower.

Here are some detail shots:

"Radiant Dahlia" by Andrea Arbit
5x7 colored pencil drawing on black paper
(detail)

"Radiant Dahlia" by Andrea Arbit
5x7 colored pencil drawing on black paper
(detail - shown without included mat)

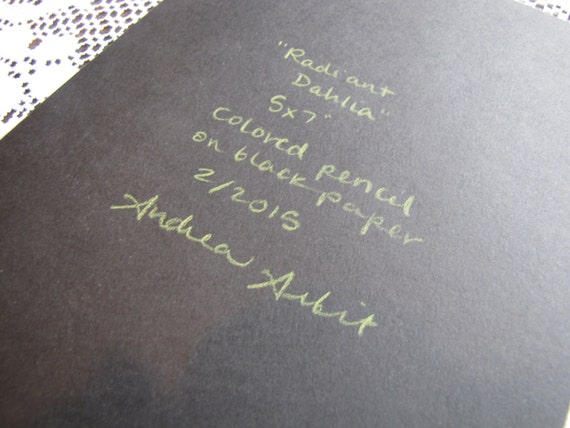
(Back of drawing)

Here is the detail shot I posted on Instagram:


I cropped my source photo on the sides so that the petals would fill the drawing right to the edge of the pages, and to focus on the interesting petals in the middle. Here is the photograph I worked from, as I first captured it. I took this photo at a garden in Rochester, New York in the summer of 2012, when my husband and I were in town for the wedding of one of his relatives.


Dahlias are so pretty, and pink-orange is one of my favorite colors for flowers. I feel like they often have the best range of lights and shadows at different times of day, and roses of this color combination usually dry into really interesting color patterns.

Tuesday, November 24, 2015

Finished 4"x6" Leaf Paintings

Just like with the 8"x10" paintings I posted about yesterday, I ironed these 4"x6"s to get them flat, and then abandoned them under a stack of heavy books for several days. Then I put white mats on them (5"x7" size).

I decided to sell them as a set (because they're small and would look kind of lonely by themselves), so here is the listing on Etsy!

"Fallen Leaves I" & "Fallen Leaves II"


And here are some detail shots -


I listed the watercolor and colored pencil colors on the backs of the paintings (just like I did for the full-size 8"x10"s). The fronts were left unsigned so that they can be displayed horizontally or vertically in any direction.


They're ready for 5"x7" frames! Buy the set for only $49 on Etsy. These are the original one-of-a-kind watercolor/colored pencil collages - not prints! :)

Alright, I think 5 posts is enough about these leaf paintings. :) I'll post something new tomorrow.

Monday, November 23, 2015

Finished 8"x10" Leaf Paintings

So now that you've seen me go through the process of how I made these leaf paintings, you can really appreciate the final product. Right? :)

I ironed the paintings so that the edges were flat, and then I flattened them under a stack of heavy books for several days. Then, I matted them and photographed them to upload to Etsy. Each of these 8"x10" paintings comes with a white Crescent brand 11"x14" mat suitable for framing.

Here is "Autumn Leaves I" (available for sale here):


And some close-ups -


On the back of the painting, I listed the watercolor pigments and colored pencils used, and signed/dated it. I left the front unsigned so that it can be hung horizontally or vertically, in any direction.


Here is "Autumn Leaves II" (available for sale here):


And the close-up photos -


And the list of watercolors and colored pencils used on the back (same as for the other painting) -


They're listed on Etsy separately, but I think they'd also look great together as a set. Here they are together -


I'll show off the 4"x6" set of leaf paintings (after ironing, flattening, and matting) in a post tomorrow.

Saturday, November 21, 2015

Leaf Paintings - Post 2

Yesterday I started describing the process for creating my fall leaf paintings, and today I have a lot more photos to show you.

(The finished products - 2 8"x10" paintings and 2 4"x6" paintings can be found on sale here.)

As I showed yesterday, I put some masking down on the paper to preserve some areas before I painted over with any pigments. After all of the paint for that first red-orange-yellow layer was dry, I peeled the masking fluid off.


Because I was working on four paintings at once, some paintings were still getting their "first round" of stamping done while I peeled off the masking fluid and moved on with those that were ready.


Once the masking fluid was all removed, I was ready to stamp some more. This time I added in green for a focal point to stand out against the red-orange-yellow background. I also used a greater variety of leaf sizes and shapes, and tried to leave the leaves on longer, so they would be darker and crisper, with visible outlines, leaf stems, and veins.


To help secure the leaves in place while the pigment was transferring, I put things on top of the leaves, like boxes of playing cards and the bottle of masking fluid (whatever I had handy at the table I was working at).


Here you can see some of the darker orange and yellow leaves, after they'd been sitting for some time.


I also found that wetting the leaves on the opposite side (pushing on the opposite side with my watercolor brush) helped to push the pigment off the leaves and onto the paper.


The first two that got to this second stage of leaf stamping were okay - but not exactly what I was hoping for. You can see in the close-ups that the green leaves were actually left on the paper too long, giving them kind of a weird quality I didn't like. These were the two paintings that I eventually scraped or cut into smaller pieces for the 4"x6" paintings.


The last two paintings turned out better (I learned from my mistakes). Here are some close-ups of the last two paintings.


After all of them had been stamped with all four colors (red, orange, yellow, and green) and I was satisfied with the amount of paper covered in pigment vs. the amount of white paper still visible, I left them to dry overnight.

The next day, I went back through with colored pencil to emphasize some of the leaf shapes - but those photos are the story for tomorrow!

If you are interesting in purchasing these paintings, check out my Etsy shop here!