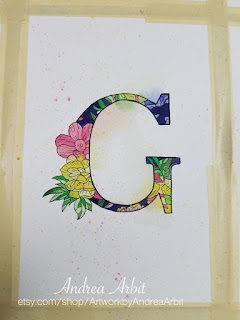
If you keep up with my blog regularly, you know exactly what this post is going to be about. I'm in the middle of a series of twenty-six 5"x7" floral alphabet watercolors, one small painting for each letter. My last post featured E and F, and today's post is all about the letters G and H.
The step by step process for creating these letters was the same as for my previous paintings. I started with an ink outline, taped down onto gatorboard with masking tape to keep the paper flat while I painted.
The first layer of color is all about light, bright colors - deciding which flowers will be which colors, and putting just a little bit of pigment down.
Next, I added darker blue and purple paint to the non-floral parts of the letters, and splattered pink and yellow paint over the paintings by loading up a brush with very watery paint and flicking the tip of the brush with my finger.
Finally, I added more layers of darker and brighter colors to finish up the paintings.
If you remember from my post on letters C and D, I actually worked on C-H simultaneously. Once G and H were done, all six letters that I was currently working on were finished. Here is the set of six, before I pulled off the masking tape.
And here are just G and H, untaped, signed, and finished and ready for scanning. I will likely have these original paintings for sale as well, but my main goal with these was to create something that I could scan in and print on blank notecards, to create notecard sets with single initials.


No comments:
Post a Comment