Saturday, June 23, 2018

"Flight" Colored Pencil Drawing

You can purchase this finished drawing here in my Etsy shop.

After finishing "Ambition" and "Fertility" (two 8x10" colored pencil drawings of flowers on red paper, which I wrote about on this blog here and here), I continued with my symbolic floral colored pencil series - this time creating two drawings on blue paper. I called the first of these blue drawings "Flight" - after the symbolism of the birds of paradise flower.

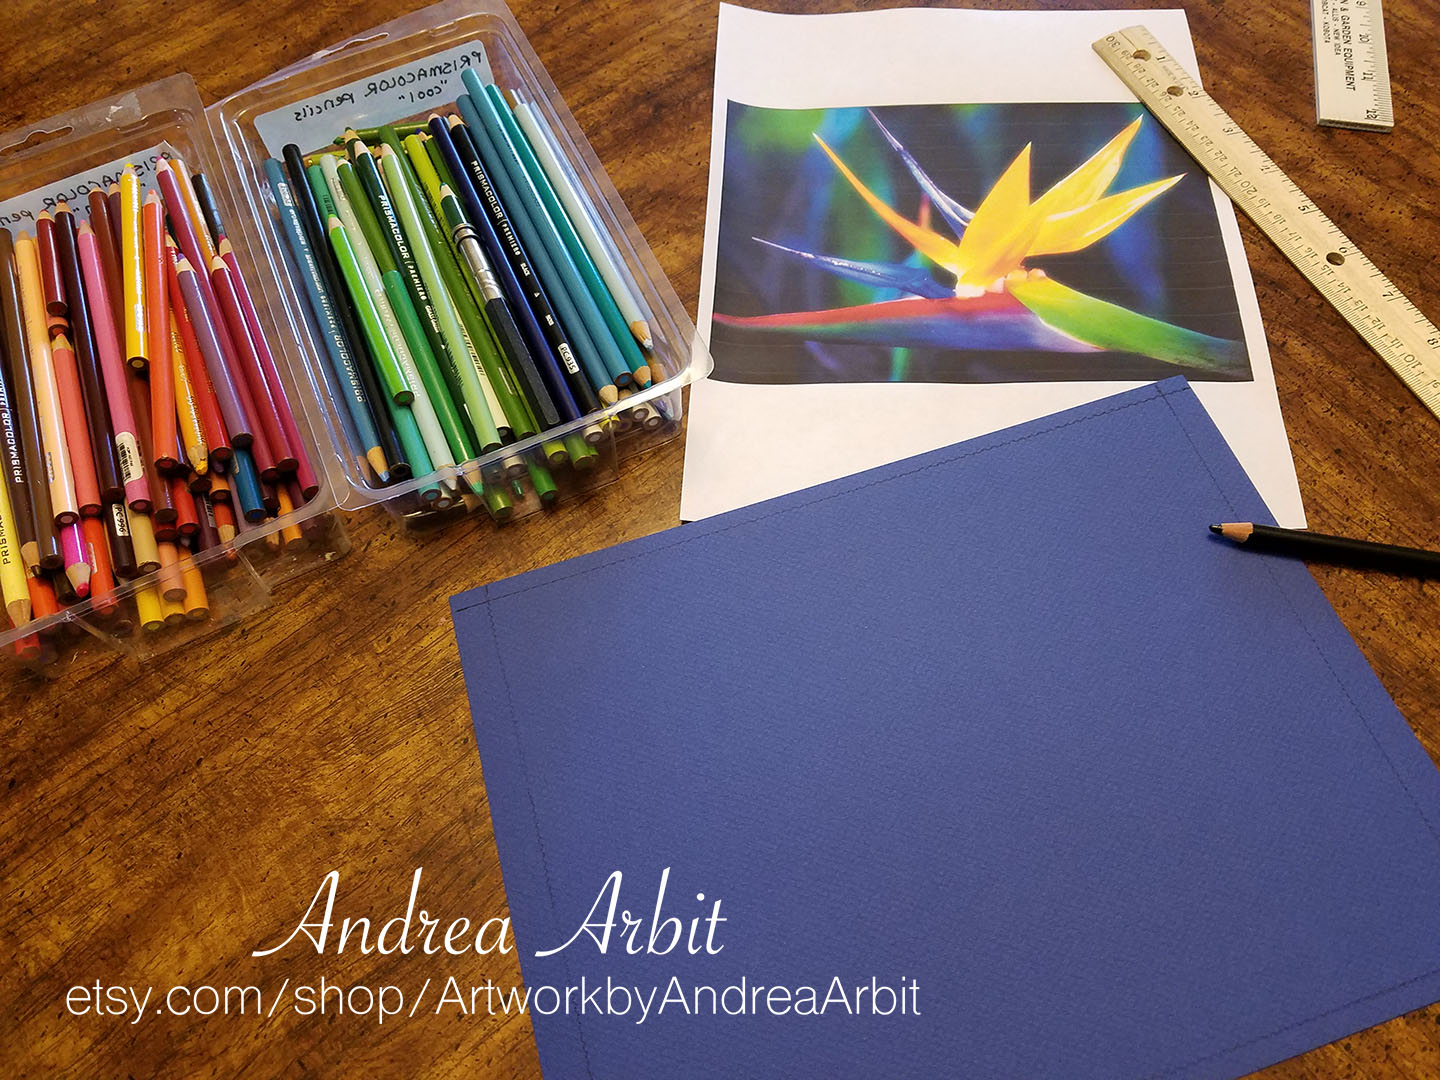
In this first photo, you can see my collection of Prismacolor colored pencils (separated into "warm colors" and "cool colors"), the source photograph I found on Google images of a birds of paradise flower, and my piece of blue Canson Mi-Tientes paper.


As usual, I started with a light sketch of the flower, getting the colors and shapes blocked off so I would be able to see the composition as a whole.


Once that initial layer was complete, I started adding more layers of color, as well as details and dimensionality.


Here is the final drawing:


Because this drawing is only of one single birds of paradise flower (rather than a collection of many pomegranate flowers or hollyhock, which I used for the compositions in "Fertility" and "Ambition" respectively), and because of the unique nature of this particular species, this drawing takes on a more abstract feel than my other drawings so far in this series. I could have included a whole bunch of birds of paradise, but I felt that a single flower better captured the symbolism of "flight" - by featuring only one flower, you can really see the detail of the colors, lines, and shapes, which gives it that majestic feeling of a bird about to take flight.

The other drawing I recently completed on blue paper is titled "Playfulness" - and it's the subject of the next blog post I'll write. :)

You can purchase this finished drawing here in my Etsy shop.

Wednesday, June 20, 2018

NYC Photos - Central Park Zoo

As I mentioned in my last post, my husband and I went to Central Park on two separate days of our vacation to New York City. On the last day - Friday, April 6 - we walked through part of the northern edge of Central Park and the rainy, not-yet-blooming Conservatory Gardens, before seeking shelter from the weather at a nearby Starbucks and the Jewish Museum. Then, after lunch (and once the sun started to peak out behind the clouds just a little), we ventured out to the Central Park Zoo to try to soak up just a little more Vitamin D.

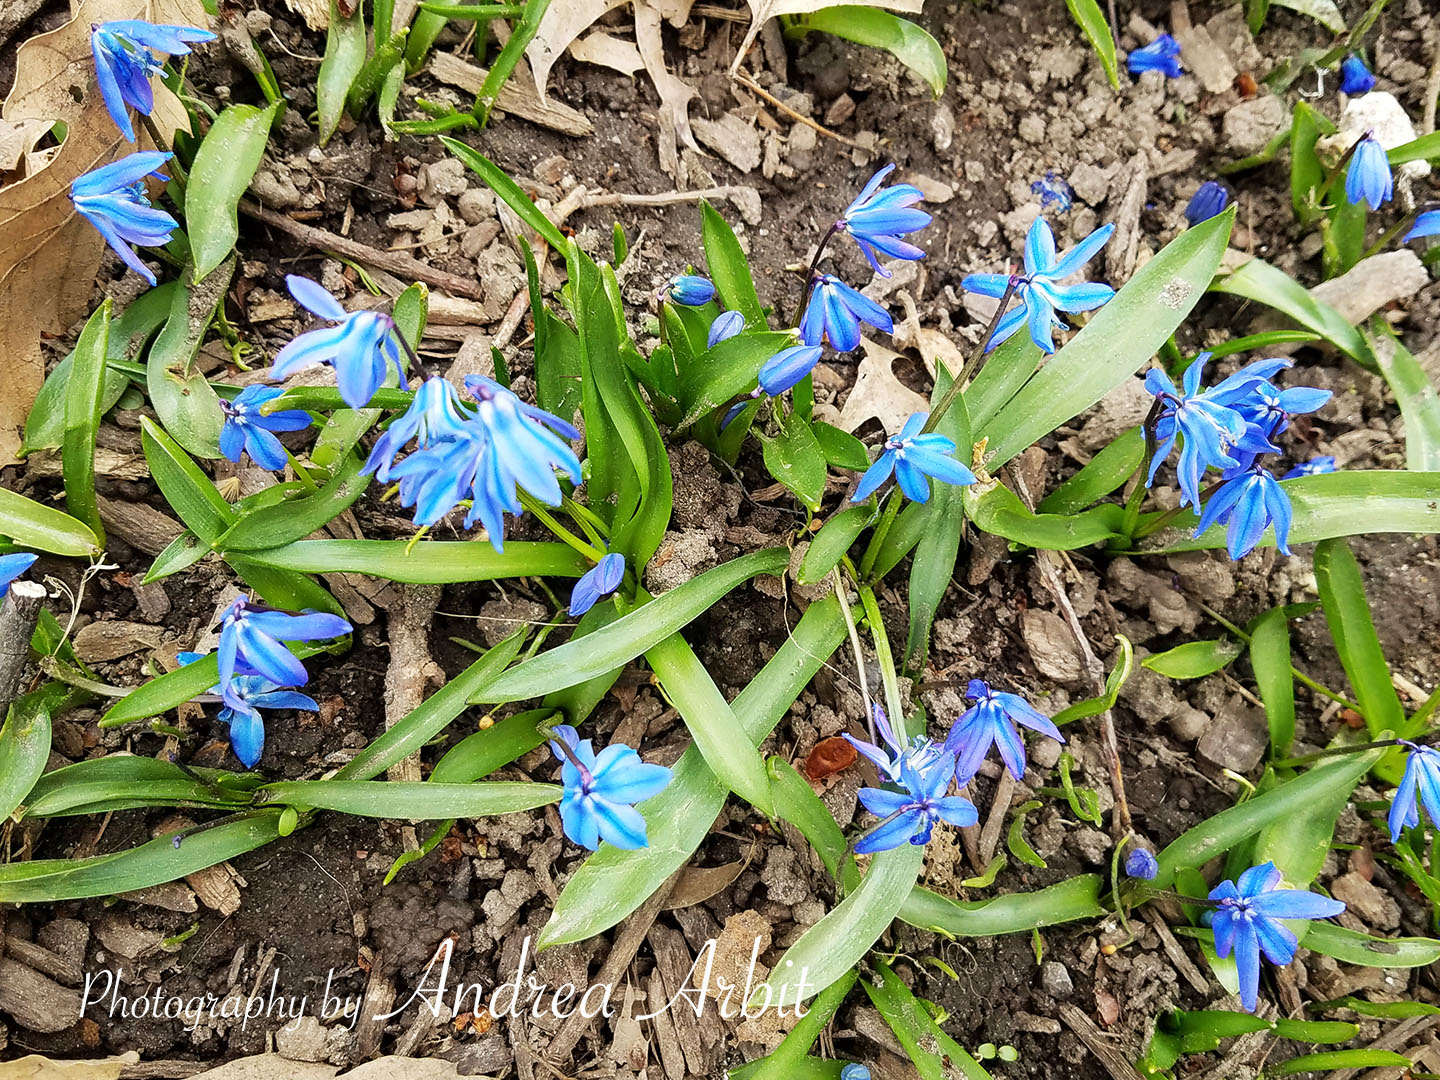
Here are some of my favorite photos of the animals (and a few flowers/plants!) we saw at the Central Park Zoo:


Saturday, June 16, 2018

NYC Photos - Central Park

During our eight days in New York City in late March/early April, my husband I walked through Central Park twice - once on Sunday, April 1st (Easter Sunday), when we walked through much of the Southern half of the park, and again on Friday, April 6, when we walked through part of the Northern edge to see the Conservatory Gardens. It was unfortunately raining on Friday, so we didn't spend as much time there as I would have liked - but there was also not much to see, given that the colder-than-average weather meant there was very little yet in bloom.

Later on Friday, once the rain stopped, we also went to the Central Park Zoo - but I'll save the photos of the animals for another blog post. :)

This blog post features some of the landscape views throughout Central Park, as well as close-ups of some of the spring flowers I saw in bloom.


Wednesday, June 13, 2018

NYC Photos - Channel Gardens

When my husband and I were on vacation in New York City the first weekend of April, it was also Easter weekend. As a result, the Channel Gardens floral display outside of the 30 Rock building (part of the Rockefeller Center) was overflowing with beautiful flowers typical of spring/Easter - white lilies, pink carnations, yellow daffodils, purple hyacinth, and tiny tree blossoms.

There were also topiaries sculpted into the shapes of flowers and butterflies (which honestly didn't look too great - the weather was pretty chilly, and the topiaries were looking a little brown), as well as a giant rotating bunny, balancing a colorful floral Easter egg on its nose.

We visited the Rockefeller Center the day before Easter - Saturday, March 31 - and they were setting up for an Easter egg hunt in front of the ice rink. Given how the colder-than-average weather persisted well into April, I can't imagine these flowers stayed looked great very long after Easter - but at least I got some good photos in while they were still freshly planted! :)


Thursday, June 7, 2018

Novel(s) Update

I recently came to the conclusion that I was trying to cram too many stories into a single novel/series of novels. I was intertwining different stories together (each with different voices/narrators), thinking that because they had some of the same themes, they should work together - but really it just became confusing for any potential readers to follow, and each part started taking away from the other parts, rather than building off each other and making each other better.

Further, I decided that the reason I was doing that (the reason I OFTEN do something like that when attempting to write novels) is because I don't feel, for whatever reason, like I am allowed to tell the story I really want to tell. I doubt my abilities as a writer, or I worry that the story will be unmarketable, or I worry that the story's subject matter will offend people - in short, I worry too much what other people might think. In an attempt to still write, but somehow soften the writing, I therefore BURY my writing - underneath other layers of writing. I posit that a story that reads not good enough or not professionally polished could be more easily forgiven if it was framed within the context of someone writing the story, and so I bury the story I am less sure about within a larger story of an author's life. Or I use too much vague symbolism or too many extended metaphors to make potentially abrasive content easier to swallow (for me to write, or for others to read), and then try to pair it with another story with less symbolism to mirror that story and help explain it. None of that is necessary to do - nor particularly helpful, or original, or easy for someone to read and enjoy - but I do it because I feel like it would be presumptuous of me to assume people might care to read my writing. I make my stories discoverable only to those who are willing to put in the effort to prove they want to hear what I have to say, the archeologists who are eager and capable of unearthing the fossils I've hidden in the dirt. I do this because I feel like I am not allowed to let my words shine on their own. It's a habit likely born from low self-esteem and a penchant for making myself suffer. But it's also a habit I'm trying to break.

What I am in the process of doing, then, is splitting up the story I was writing into two separate narratives. I am also changing the structures and timelines of these stories a bit, to make them work better as standalone stories. For each, I am figuring out what the real story I want to tell is - and then I am trying to find the courage within myself to sit down and tell it, without burying it and watering everything down.

Right now I'm not quite working on them simultaneously - I'm working on one and then the other - but that may change once I have new outlines and plans drawn up for both. One story is well outlined and already at least 1/3 complete, based on what I had already written; the other is going through more drastic structural changes, and I'm still working out the exact details of how it's going to look. But once I have all those ideas in place, I could foresee it being relatively easy to go back and forth between the stories, working on them nearly concurrently, if I wanted to. We'll see how I feel.

In any case, even though it's a lot of work to rethink and rework my novel(s), I do think it will make for better writing, when all is said and done. And hopefully I'll be able to continue this process as I write, stopping to ask myself every once in awhile if I'm "doing it again" - burying my words under other words and not letting them shine.

Friday, June 1, 2018

Varnishing Acrylic Paintings

I recently finished up my sister-in-law's Charlotte Skyline acrylic painting with an isolation layer and two layers of varnish, to help protect the three large canvases while they are shipped to her and on display in her apartment for years to come.

Because I had never done this step to an acrylic painting before, having only minimal experience with acrylic and using only making small paintings (or ones not even on canvas, but just on acrylic paper), I first had to buy the supplies.

I bought a new flat brush, Golden polymer varnish, and Golden soft gel gloss. (I also bought Golden soft gel matte, thinking I could use that as an isolation layer - only to later read on the label "DO NOT USE AS AN ISOLATION LAYER," at which time I went out and bought the soft gel gloss as a replacement.)

I used the Golden brand website to find instructions for how to apply the isolation layer and varnish layer. The directions were also on the labels.

I applied an isolation layer to my "test painting" first - "Find a Proverbial Mountain," the much smaller acrylic painting I completed in November 2016. I let that dry for a couple days, and then added a layer of varnish on top. When that painting survived just fine with no ill effects, I decided I was ready to try tackling the large skyline triptych.


Assembling my materials

Adding a layer of varnish to my painting

I followed the same procedure on the larger painting, following the directions on the label for ratio of soft gel gloss to water, and applying it in a thin isolation layer. It was white at first, but dried clear.


After I'd given that a couple days to dry, I went in with the polymer varnish (also diluted with water according to the label instructions). I did one coat to all three paintings, let it dry for 24 hours, and then added a second thin coat on top.


I then let it sit on my table for two weeks to make sure it was all fully dried and cured. I knew I would have to wrap the canvases in plastic and bubble wrap (not to mention packaging them in cardboard boxes) in order to ship them to North Carolina, so I wanted to make sure they were completely dry and ready before I did any of that.

They turned out great! And now I have the supplies on hand to do the same steps to any future acrylic paintings as well, to make sure they're all protected and will last a long time.